Quantcast
Channel: Samsung How To’s – TheUnlockr
Viewing all 242 articles
Browse latest View live

How to Root and Install ClockworkMod Recovery on the Samsung Galaxy S4 Mini (GT-I9195)

$
0
0
Samsung-Galaxy-S4-mini-root

The Galaxy S4 Mini, as its name signifies, is the slightly smaller version of the Samsung Galaxy S4 and is a star in its own right.  The device sports a 1.7GHz dual-core processor with a generous 1.5GB of RAM, an 8MP camera, and a 4.3-inch sAMOLED touchscreen display.  As with its elder sibling, rooting this device is bound to give you much more functionality than the stock firmware and if this what you had in mind, the guide below should help you do it, and install ClockworkMod Recovery (so you can flash custom recoveries) in the process.

I.  Before You Begin

1.  Backing up everything you care about is a good idea before you start.

2.  Charge your device to 75% or more before you begin to prevent unwanted shutdowns during the procedure.

II.  Necessary Downloads

1.  Odin_v3.07.zip

2.  GT-I9195_MF5_870901_kernel.tar.zip [Link attached to this post]

3. recovery-clockwork-6.0.3.3-serranoltexx.tar.zip [Link attached to this post]

III.  Flashing the Insecure Kernel

1.  Extract Odin_v3.07.zip to a folder on your desktop.

2.  From the extracted folder, double-click on Odin3 v3.07.exe to run the Odin application.

3.  Click on the PDA tab, navigate to the location of GT-I9195_MF5_870901_kernel.tar.zip, select it and click on Open to load it on to Odin.

4.  Uncheck the F. Reset Time checkbox under the Option section.

5.  Put your device into Download mode and connect it to your Windows PC using a compatible microUSB cable.  To put your device into Download mode, with the device powered down, press and hold the Volume Down + Home + Power buttons until you see a menu and press the Volume Up button.  If you see any drivers being installed on your PC at this point, let them do so before you continue.  Once the driver installation is complete, Odin should recognize the device and the ID:COM field should light up yellow.

6.  Press the Start button and wait for your device to reboot.

IV.  Flashing the Custom Recovery and Rooting the Galaxy S4 Mini

1.  Follow the same steps as in previous section, but on Step #3, use the recovery-clockwork-6.0.3.3-serranoltexx.tar.zip file.

2.  After the reboot is done, power down your phone and boot into recovery by pressing the Volume Up + Home + Power buttons.

3.  You should be asked if you want to root your device when you try to exit recovery.  Select Yes.

4.  Reboot your device to OS.

5.  Go to the Play Store on your device and install the Superuser app.

Your device should now be completely rooted!

If this procedure helped you please thank/donate to the original developers here.

Read More: How to Root and Install ClockworkMod Recovery on the Samsung Galaxy S4 Mini (GT-I9195)


How to Root the Samsung Galaxy S4 (Verizon)

$
0
0
Root the Samsung Galaxy S4 (Verizon)

Verizon recently rolled out an update that patched the exploit that was used to gain root-access on the device and left many of the device users in dark. However, the XDA community has come forth with a root method and it seems to be working fine on the new update. It lets you re-gain root-access on your Verizon Galaxy S4 and enjoy all those root-only apps you were having before you updated your device to the new firmware. So here’s how you can root your Samsung Galaxy S4 (Verizon) smartphone:

I. Before You Begin:

1. This will void the warranty of your device. However, you can reinstate the warranty by unrooting your device if there’s any unrooting procedure available.

2. Make sure you’ve appropriate drivers installed on your PC. If you don’t, get them from here.

3. You must have a microSD card formatted as exFAT.

II. Downloading Required Files:

1. Root Package (Download link’s available in the first post)

2. Terminal EmulatorQR Code (Google Play Link)

III. Rooting the Samsung Galaxy S4 (Verizon):

1. Download and place the Root Package archive on your Desktop.

2. Extract files from the archive over to your Desktop.

3. Head over to the Google Play and download and install the Terminal Emulator app on your device.

4. Insert the microSD card to your device.

5. Plug in your device to your PC using the USB cable.

6. Copy all the files you extracted from the Root Package over to the root of your microSD card.

7. Once all the files have been copied, open the Terminal Emulator app on your device.

8. Type in following commands into the app:

cd /mnt/extSdCard
./pwn
./script.sh

9. The above commands will root your device.

10. Once the commands finish executing, open the SuperSU app from your App Drawer.

11. It’ll ask you to update binaries, just allow it to do so.

12. Reboot your device once and you’ll have full root-access on your device!

13. You’re all done!

Excellent! Your Verizon Samsung Galaxy S4 has been successfully rooted on the latest update you just updated your device with!

IV. Flash a Custom Recovery Image (Optional):

1. If you would like to flash a custom recovery image in order to flash custom ROMs, head to the How To Flash a Custom Recovery Image on the Samsung Galaxy S4 (Verizon) to learn how to do that.

If this procedure helped you please thank/donate to the original developers here.

Read More: How to Root the Samsung Galaxy S4 (Verizon)

How to Install ClockworkMod Recovery on the Samsung Galaxy S4 (Verizon)

$
0
0
CWM Recovery for the Samsung Galaxy S4 (Verizon)

Maybe you’ve just rooted your Samsung Galaxy S4 from Verizon? Maybe you want to get the most out of your device by flashing some custom ROMs and mods? Either way, this guide should help. Rooting the Galaxy S4 on Verizon was a breeze and so is flashing a custom recovery. Having a custom recovery on your device is beneficial for you in all the terms, be it trying new ROMs or mods, you’ll be able to do just everything on your device. So here’s how you can go about flashing a custom recovery on your Verizon Galaxy S4:

I. Before You Begin:

1. You must have rooted your device before doing this procedure. Please head to our How to Root the Verizon Samsung Galaxy S4 procedure first, finish it, then return to this procedure and continue.

2. Make sure your device has at least 60% of battery life left.

II. Downloading Required Files:

1. ROM ManagerQR Code (Google Play Link)

III. Installing ClockworkMod Recovery on the Samsung Galaxy S4 (Verizon):

1. Head over to the Google Play and download and install the ROM Manager app on your device

2. Once the app’s been installed, launch it from your App Drawer.

3. The first option there in the app should say Flash ClockworkMod Recovery. Tap it.

4. It’ll ask you to select your device model from the list, just tap on your device’s name.

5. It’ll begin flashing the recovery on your device, will take some good time to finish.

6. Once the recovery’s been flashed, reboot your device.

7. You’re all set!

Brilliant! Your device’s been successfully equipped with a custom recovery, enjoy the custom development goodness!

IV. Flash a Custom ROM (Optional):

1. If you are ready to flash custom ROMs on your device, head to the How To Flash a Custom ROM on the Samsung Galaxy S4 (Verizon) to learn how to do that.

If this procedure helped you please thank/donate to the original developers here.

Read More: How to Install ClockworkMod Recovery on the Samsung Galaxy S4 (Verizon)

How to Unroot the Samsung Galaxy S4 (Verizon)

$
0
0
Unroot the Verizon Samsung Galaxy S4

Have you had enough playing with your rooted Samsung Galaxy S4 (Verizon)? Maybe you’ll want to unroot your device so you can have your lost warranty back and then you can play safely with your device. Rooting the Verizon Galaxy S4 was an easy task and so is the unrooting. Here’s how you can unroot your Samsung Galaxy S4 from Verizon:

I. Before You Begin:

1. You should have rooted your device using the procedure given here.

2. Make sure your device has at least 70% of battery life left.

II. Downloading Required Files:

1. Stock Firmware

2. Odin

III. Unrooting the Samsung Galaxy S4 (Verizon):

1. Download and place both the archives on your Desktop.

2. Extract files from both the archives over to your Desktop.

3. Double-click on the Odin executable file and it’ll open.

4. Click on PDA and select the Stock Firmware file available on your Desktop.

5. Make sure you haven’t checked Repartition box in the tool.

6. Checkmark the boxes that say Auto Reboot and F. Reset Time.

7. Now turn OFF your device

8. Turn it back on by holding down Volume DOWN+Home+Power buttons together.

9. Press the Volume UP button to go into Download mode.

10. Plug in your device to your PC using the USB cable.

11. Hit Start in the Odin and it’ll begin flashing the stock firmware on your device.

12. It will take some good time to flash the firmware on your device, so sit back and relax.

13. Once the firmware’s been flashed, reboot your device.

14. You’re all done!

Excellent! You’ve successfully unrooted your Verizon Samsung Galaxy S4 device!

If this procedure helped you please thank/donate to the original developers here.

Read More: How to Unroot the Samsung Galaxy S4 (Verizon)

How to Root the Galaxy Nexus and the LG Nexus 4 running Android 4.3 OS

$
0
0
Nexus-4-Galaxy-Nexus-root-twrp

If you have updated to the enticingly new Android 4.3 OS that Google recently rolled out on your Galaxy Nexus or the Nexus 4, chances are that you will have lost your root privileges.  The guide below aims to remedy that and also install a custom recovery (TWRP Recovery in this case) in the process.

I.  Before You Begin

1.  Make sure that you are updated to Android 4.3 (version JWR66V) before you start.

2.  Ensure that you have the proper fastboot and ADB drivers installed; if not, our guide should help you to do it.

3.  Back up everything you feel is important as there is a chance that you might lose all the data you have on your device.

4.  Charge your device to 75% or more to prevent unwanted shutdowns.

II.  Necessary Downloads

1.  openrecovery-twrp-2.6.0.0-maguro.img [or the latest version available for the Galaxy Nexus GSM Unlocked version]

2.  openrecovery-twrp-2.6.0.0-mako.img [or the latest version available for the Nexus 4]

3.  UPDATE-SuperSU-v1.50.zip

4.  Android.zip

III.  Flashing Custom Recovery

1.  Put your device into fastboot mode.  To do this, with the device powered off, press and hold the Volume Down + Volume + Power buttons until you see a green Start text.

2.  Connect your device to your PC.  If drivers are installed at this point, let them do so and continue afterwards.

3.  Extract Android.zip to a folder on your desktop.

4.  Copy openrecovery-twrp-2.6.0.0-maguro.img [or openrecovery-twrp-2.6.0.0-mako.img depending your device type] to the extracted Android folder.

5.  Open up a command prompt on the Android folder [hold shift, right click on the folder and select 'Open Command Prompt Window here']

6.  Run the following command [the below command is for Galaxy Nexus; if you are rooting the Nexus 4, change the filename at the end of the command to openrecovery-twrp-2.6.0.0-mako.img]

fastboot flash recovery openrecovery-twrp-2.6.0.0-maguro.img

7.  Reboot your device.

IV.  Rooting the Galaxy Nexus/Nexus 4

1.  Connect your device to your PC and copy UPDATE-SuperSU-v1.50.zip to your device’s SD card.

2.  Power down your device and boot into TWRP Recovery.  To do this, with the device powered down, press and hold the Power + Volume Up + Volume Down buttons until you see Start highlighted.  Now press the Volume Down button twice to highlight Recovery mode and press the Power button to boot into recovery.

3.  Once in TWRP, tap on Install and navigate to the location of UPDATE-SuperSU-v1.50.zip and tap on it to add to the flash queue.

4.  Swipe from let to right where it says Swipe to Confirm Flash to begin the process.

5.  Go back to the main menu and tap on Reboot, then System to reboot your device.

Once your device reboots, your Samsung Galaxy Nexus or the LG Nexus 4 should be completely rooted!

Read More: How to Root the Galaxy Nexus and the LG Nexus 4 running Android 4.3 OS

How to Root the Samsung Galaxy Discover SGH-S730M

$
0
0
Root the Samsung Galaxy Discover

Rooting the newer devices might seem an easy task because of the latest methods being cooked-up for such devices. However, for the older devices like Samsung Galaxy Discover, rooting might seem a daunting task. Well, Unlock Root has proven it wrong by providing a simple method to root the aforementioned device. It’s just a matter of a few clicks and you’re good to go. So here’s how you can root your Samsung Galaxy Discover and get the most out of it:

I. Before You Begin:

1. This will void the warranty of your device. However, you can reinstate the warranty by unrooting your device if there’s any unrooting procedure available.

2. This should work on Windows based PCs only.

3. You must have Samsung USB Drivers installed on your PC. If you don’t, get them from here.

II. Downloading Required Files:

1. Unlock Root (Download link’s given in the first post, under Rooting section)

III. Rooting the Samsung Galaxy Discover SGH-S730M:

1. Download and place the Unlock Root tool on your Desktop.

2. Double-click the tool’s executable file and install it on your PC.

3. Connect your device to your PC using the USB cable. Make sure your device’s turned ON.

4. Launch the Unlock Root tool you installed earlier on your PC.

5. Hit Root button in the tool and it’ll start rooting your device.

6. Say NO if the tool offers you to install some bloatware apps on your device.

7. You should get a confirmation message once your device has been rooted.

8. You’re all done!

Excellent! Your Galaxy Discover has been successfully rooted and you now have full control over all the functions of your device. Just tinker around them and see what happens!

IV. Flash a Custom Recovery Image (Optional):

1. If you would like to flash a custom recovery image in order to flash custom ROMs, head to the How To Flash a Custom Recovery Image on the Samsung Galaxy Discover SGH-S730M to learn how to do that.

If this procedure helped you please thank/donate to the original developers here.

Read More: How to Root the Samsung Galaxy Discover SGH-S730M

How to Flash a Custom Recovery on the Samsung Galaxy Discover SGH-S730M

$
0
0
Flash Recovery on the Samsung Galaxy Discover

So you just rooted your Samsung Galaxy Discover and wish to give custom ROMs a shot? No problem, but before you can do that you’re going to need a custom recovery. This post explains how you can get a custom recovery up and running on your Galaxy Discover and then get the best Mods and ROMs running on your device. Here’s how:

I. Before You Begin:

1. You must be rooted before you can do this procedure. Please head to our How to Root the Samsung Galaxy Discover procedure first and root your device.

2. This procedure works on Windows based PCs only.

II. Downloading Required Files:

1. ClockworkMod Recovery (Download link’s given in the first post, under Custom Recovery section)

2. Odin (It’s attached in the first post)

III. Flashing a Custom Recovery on the Samsung Galaxy Discover SGH-S730M:

1. Download and place both the files on your Desktop.

2. Extract files from both the archives over to your Desktop.

3. Double-click on the Odin executable file and it’ll open.

4. Click on PDA and select the CWM Recovery file you extracted earlier to your Desktop.

5. Make sure you haven’t checkmarked the box saying Repartiton.

6. Turn OFF your device.

7. Turn it back on by holding down Volume DOWN+Power buttons together.

8. Your device should reboot into the Download mode.

9. Plug in your device to your PC using the USB cable.

10. Hit Start in the Odin and it’ll begin flashing the recovery on your device.

11. It should take a couple of minutes to finish the job.

12. Once the recovery’s been flashed, reboot your device.

13. You’re all done!

Congrats! Your device’s been successfully equipped with a custom recovery. Go ahead and taste-out some of the best ROMs for your device!

IV. Flash a Custom ROM (Optional):

1. If you are ready to flash custom ROMs on your device, head to the How To Flash a Custom ROM on the Samsung Galaxy Discover SGH-S730M to learn how to do that.

If this procedure helped you please thank/donate to the original developers here.

Read More: How to Flash a Custom Recovery on the Samsung Galaxy Discover SGH-S730M

How to Root (and Unroot) the Samsung Galaxy Y Duos (S6102)

$
0
0
samsung-galaxy-y-duos-root

The Samsung Galaxy Y Duos is a dual-SIMMed newer sibling of the popular Galaxy Y and while there are any high-end features to write home about, it does suffice nicely for a entry-level device that has the major aspects Android covered.  The device sports  a 3.14-inch touchscreen display, an 832MHz CPU with 512MB RAM, and runs the age-old Android 2.3.3 Gingerbread firmware.  If you want to try something newer like ICS or even Jelly Bean on it, custom ROMs is the only way to go and to get there, you need to root the device and install a custom recovery on it.  Use the guide below to know how to root (and unroot if needed) the Galaxy Y Duos S6102.

I.  Before You Begin

1.  Back up everything you feel is important before you begin.

2.  Make sure you have charged your device to 75% or more before you begin.

II.  Necessary Downloads

1.  update.zip [File attached to this post]

2.  unroot.zip [File attached to this post]

III.  Rooting the Galaxy Y Duos

1.  Connect your device to your PC using a microUSB cable and copy the update.zip file you downloaded above to your SD card (Do not put it into any subfolders, just the main folder so the path is sdcard/update.zip).

2.  Power down your device and put it into recovery mode.  To do this, press and hold the Volume Up + Home + Power keys until you see the Samsung Galaxy Y logo and let them go after that.

3.  Use the Volume buttons to highlight “select update.zip from sdcard” and press the home button to select it.

4.  On the next screen, select update.zip, and then select Yes on the next screen.

5.  Once the flashing is done, go back to the main menu and reboot your device.

That’s it!  Your Galaxy Y Duos is now rooted!

IV.  Installing Custom Recovery

If you want to install a custom recovery which will help you flash custom ROMs and other files, go on ahead and use our guide.

If this procedure helped you please thank/donate to the original developers here.

Read More: How to Root (and Unroot) the Samsung Galaxy Y Duos (S6102)


How to Install Custom Recovery on the Samsung Galaxy Y Duos (S6102)

$
0
0
samsung-galaxy-y-duos-cwm

Now that you are rooted, the next obvious step if you want to flash custom ROMs on your Galaxy Y Duos is installing a custom recovery.  Installing a custom recovery not only gives you the option to flash ROMs but also make backups and delete/clear cache/system among other things.  The guide below should help get your custom recovery (ClockworkMod Recovery in this case) up and running in no time.

I.  Before You Begin

1.  Your device needs to be rooted to have custom recovery on it.  You aren’t already rooted, use our guide to help you.

2.  As always, back up everything you care about and charge your device to 75% or more before you begin.

II.  Necessary Downloads

CWM-6102.zip [Link available in this post]

III.  Installing ClockworkMod Recovery

1.  Connect your device to your PC using a microUSB cable and copy the CWM-6102.zip file you downloaded above to your SD card (Do not put it into any subfolders, just the main folder so the path is sdcard/CWM-6102.zip).

2.  Power down your device and put it into recovery mode.  To do this, press and hold the Volume Up + Home + Power keys until you see the Samsung Galaxy Y logo and let them go after that.

3.  Use the Volume buttons to highlight “select update from sdcard” and press the home button to select it.

4.  On the next screen, select CWM-6102.zip, and then select Yes on the next screen.

5.  Once the flashing is done, go back to the main menu and reboot your device.

You now have ClockworkMod Recovery installed on your device!  To use it, follow the same rebooting instructions as in Step #2 of the previous section.

IV.  Flashing a Custom ROM

Use our guide on how to flash a custom ROM if you are unfamiliar with this.

If this procedure helped you please thank/donate to the original developers here.

Read More: How to Install Custom Recovery on the Samsung Galaxy Y Duos (S6102)

How to Root the Samsung Galaxy Tab 3 8.0 and Install Custom Recovery

$
0
0
Galaxy-Tab-3 8.0-Root-TWRP

The latest iteration in the Galaxy Tab series, the Galaxy Tab 3, has a lot going for it.  The Galaxy Tab 3 8.0 specifically features a 5MP camera, 16 or 32GB of onboard memory, a dual-core 1.5GHz CPU with 1.5GB of RAM, and as its name suggests, an 8-inch touchscreen display.  The device is now rootable and also has a custom recovery ready to be flashed, so custom ROMs should also be on their way pretty soon.  The guide below should help you get ready to flash custom ROMs, by way of rooting the device and install custom recovery (TWRP Recovery in this case).

I.  Before You Begin

1.  Make sure you have backed up everything you care about from the device before you begin.

2.  Charge your device to 75% or more before you start.

3.  Install the proper drivers before you start.  Usually, installation of Kies will take care of this.

II.  Necessary Downloads

1.  Odin307.zip

2.  TWRP_T31x_r3.tar [or the latest version from this post under the Downloads section]

3.   ROOT_SGT3_8.0.zip

III.  Installing TWRP Recovery on the Galaxy Tab 3 8.0

1.  Extract Odin307.zip to a folder on your desktop.

2.  Copy TWRP_T31x_r3.tar to the extracted Odin307 folder.

3.  Double-click on Odin3 v3.07.exe from the extracted folder to start the Odin tool.

4.  Power down your device and put it into download mode.  To do this, press and hold the Home + Volume Down + Power buttons simultaneously for 3 to 5 seconds until you see the warning screen.

5.  Connect your device to your Windows PC using a compatible microUSB cable.  If your PC installs drivers at this point, let it do so.  Once that is done, the ID:COM field on Odin should light up yellow, signifying that Odin has recognized your device without a problem.  If not, make sure you install the proper drivers (by installing Samsung Kies) and try again.

6.  Click on the PDA button on Odin and navigate to the location of TWRP_T31x_r3.tar to load it on to Odin.

7.  Make sure that only F. Reset Time is selected under the Option section and then click on Start.

8.  Your device will reboot once the procedure is done and you should have TWRP Recovery installed!

IV.  Rooting the Galaxy Tab 3 8.0

1.  Boot into recovery by powering down the device, pressing and holding the Power + Volume Up buttons until you see the Galaxy Tab 3 splash screen and letting go of the Power button once you see it.  Continue pressing the Volume Up button until you get to TWRP Recovery.

2.  Hold your device in portrait mode, and tap on Reboot on the bottom right of the screen and then select System on the next menu.

3.  You will be asked to install root.  Accept it and the device will reboot.

4.  Follow the on-screen instructions that will now appear after your device has powered on.

V.  Alternate method for Rooting

If the section IV steps failed to obtain root, here is an alternate method to get you going.

1.  Copy the ROOT_SGT3_8.0.zip you downloaded above to your internal/external SD card.

2.  Boot into TWRP Recovery as detailed in Section IV > Step 1.

3.  Tap on Install once in TWRP Recovery.

4.  Navigate to the location of ROOT_SGT3_8.0.zip and select it.

5.  Swipe to confirm the flash.

6.  Go back to the main menu, tap on Reboot and then tap on System.

You should definitely be rooted after your device reboots.  To confirm, install Root Checker Lite from the Play Store or any other root requiring app and you will prompted to grant root access via the now-installed Superuser app.

If this procedure helped you please thank/donate to the original developers here.

Read More: How to Root the Samsung Galaxy Tab 3 8.0 and Install Custom Recovery

How to Root the Samsung Galaxy Core (I8262)

$
0
0
samsung-galaxy-core-gt-i8262-root

The Samsung Galaxy Core may not be as powerful as its elder siblings like the Note II or the Galaxy S4 but it still manages to get a respectable place in the mid-range lineup with a 1.2GHz CPU, 1GB of RAM, 8GB of onboard memory, a 4.3-inch display and a 5MP camera.  The device currently runs Android 4.1.2 Jelly Bean and if you own this device and yearn for a taste of the latest and the best in terms of firmware, custom ROMs is the way to go and rooting the Galaxy Core is the first step in this process.  The guide below should help you take care of that step without a hassle.

I.  Before You Begin

1.  Back up everything you feel is important before you start.

2.  Charge your device to 75% or more before you begin to prevent unwanted shutdowns.

II.  Necessary Downloads

Framaroot-1.5.3.apk [File attached to this post]

III.  Rooting the Samsung Galaxy Core

1.  Connect your device to your PC and copy the Framaroot-1.5.3.apk file you downloaded above to your device’s SD card.

2.  Use a file manager app (Astro or ES File Explorer, for example), navigate to the location of Framaroot-1.5.3.apk, and install the application.  Make sure you have enabled installation of apps from unknown sources by going to Settings > Security and ticking the Unknown sources checkbox.

3.  Go to your app drawer and open up the Framaroot app.

4.  Tap on Legolas and wait for the success popup.  If that doesn’t happen, open up the app again, and this time tap on Aragorn.

5.  Reboot your device.

The Samsung Galaxy Core that you now hold in your hands should now be rooted!

If this procedure helped you please thank/donate to the original developers here.

Read More: How to Root the Samsung Galaxy Core (I8262)

How to Root the Verizon Samsung Galaxy S4 Build VRUAMDK

$
0
0
Root the Verizon Samsung Galaxy S4 on Build VRUAMDK

So you updated your Verizon Samsung Galaxy S4 to build VRUAMDK and it broke root-access? No worries, we now have an updated root method that just works fine on this latest build and lets you have all those root-only apps running on your device once again. Here’s how:

I. Before You Begin:

1. This will void the warranty of your device. However, you can reinstate the warranty by unrooting your device if there’s any unrooting procedure available.

2. Make sure your device’s running on the build VRUAMDK. See this to verify it.

3. You should have appropriate drivers installed on your PC. If you don’t, get the latest drivers from here.

II. Downloading Required Files:

1. Odin (Download link’s available in the first post)

2. Prerelease Kernel (Download link’s given in the first post)

3. Stock Kernel (Download link’s given in the first post)

4. Motochopper Root Package (Download link’s available in the first post)

III. Rooting the Verizon Samsung Galaxy S4 Build VRUAMDK:

1. Download and place all the files on your Desktop.

2. Extract files from Odin as well as Motochopper archives over to your Desktop.

3. Double-click on the Odin executable file and it’ll launch.

4. Click on PDA and choose the Prerelease Kernel file available on your Desktop.

5. Make sure that the Repartition box isn’t checked in the tool.

6. Turn OFF your device.

7. Turn it back on by holding down Volume DOWN+Power buttons together.

8. Press the Volume UP button when you see an exclamation mark on your screen. You’ll now be taken to the Download mode.

9. Plug in your device to your PC via USB cable.

10. Hit Start in the Odin and it’ll begin flashing the kernel on your device, shouldn’t take too long to finish.

11. Once the kernel’s been flashed, reboot your device.

12. Unplug your device from your PC.

13. On your device, head to Menu>>Settings>>More>>About phone and tap Build number about seven times. It should unlock the Developer options on your device.

14. Now head back to Settings>>Developer options>>USB debugigng, turn it ON.

15. Disable the Verify apps via USB option from there.

16. Turn ON the Unknown sources option by heading to Menu>>Settings>>Security>>Unknown sources.

17. Disable the Verify apps option from Menu>>Settings>>Security>>Verify apps.

18. Plug in your device to your PC once again using the USB cable.

19. Double-click on Run.bat file available on your Desktop and follow the on-screen instructions.

20. It’ll start rooting your device and you should be able to see the ongoing processes on your screen.

21. Once your device’s been rooted, launch the SuperSU app from your Menu and let it update binary files.

22. Turn OFF your device so you can flash the stock kernel back.

23. Turn it back on by holding down Volume DOWN+Power buttons together.

24. Press the Volume UP button and you should be in Download mode.

25. Launch the Odin tool available on the Desktop of your PC.

26. Click on PDA and choose the Stock Kernel file available on your Desktop.

27. Make sure the Repartition box isn’t checked in the tool.

28. Hit Start and it’ll start flashing the stock kernel on your device.

29. Reboot your device once the kernel’s been flashed.

30. You’re all done!

Excellent! After quite a lengthy root procedure, you now have full root-access on your Galaxy S4 with the stock kernel!

IV. Flash a Custom Recovery Image (Optional):

1. If you would like to flash a custom recovery image in order to flash custom ROMs, head to the How To Flash a Custom Recovery Image on the Verizon Samsung Galaxy S4 to learn how to do that.

If this procedure helped you please thank/donate to the original developers here.

Read More: How to Root the Verizon Samsung Galaxy S4 Build VRUAMDK

How to Root the Verizon Samsung Galaxy S4 Build VRUAME7

$
0
0
Root the Verizon Samsung Galaxy S4 on Build VRUAME7

Seems like Verizon doesn’t like its devices to be easily rooted and that’s why they make rooting harder with each of their software update. Lately, they rolled out build VRUAMDK to make it difficult for users to root their device. Thankfully, a root method arrived just after a couple of days and opened doors to root. This time, it’s build VRUAME7 that we’ll be rooting in the following procedure. So be ready to get your hands dirty, once again!

I. Before You Begin:

1. This will void the warranty of your device. However, you can reinstate the warranty by unrooting your device if there’s any unrooting procedure available.

2. Make sure you’ve appropriate drivers installed on your PC. If you don’t, get the latest drivers from here.

3. You must have a microSD card formatted as exFAT, insert it in your device.

II. Downloading Required Files:

1. Root Package (Download link’s available in the first post)

2. Terminal EmulatorQR Code (Google Play Link)

III. Rooting the Verizon Samsung Galaxy S4 Build VRUAME7:

1. Download and place the Root Package archive on your Desktop.

2. Extract files from the archive over to your Desktop.

3. Connect your device to your PC using the USB cable.

4. Copy all the files you extracted from the Root Package archive over to the root of your microSD card.

5. Once all the files have been copied, unplug your device from your PC.

6. Head over to the Google Play and download and install the Terminal Emulator app on your device.

7. Once the app’s been installed, launch it from your App Drawer.

8. Type in following commands into the app. These commands are case-sensitive.

cd /mnt/extSdCard
./pwn
./script.sh

9. Close the Terminal Emulator app.

10. Launch the SuperSU app and let it update binary files.

11. You’re all done!

Brilliant! You’ve successfully rooted your Verizon Galaxy S4 on build VRUAME7 and you can confirm the root-access by simply downloading the Root Checker app from Google Play!

IV. Flash a Custom Recovery Image (Optional):

1. If you would like to flash a custom recovery image in order to flash custom ROMs, head to the How To Flash a Custom Recovery Image on the Verizon Samsung Galaxy S4 to learn how to do that.

If this procedure helped you please thank/donate to the original developers here.

Read More: How to Root the Verizon Samsung Galaxy S4 Build VRUAME7

How to Root the Samsung Galaxy Grand Quattro (GT-I8552) Running I8552XXAMDB Firmware

$
0
0
Samsung-Galaxy-Grand-Quattro-Root-I8552XXAMDB

For those who haven’t updated to the latest I8552XXAMH2 firmware yet but are still looking to root their Galaxy Grand Quattro, we have a simple guide to get root privileges in no time.  Keep in mind though that this only works with the I8552XXAMDB firmware and we would always advocate updating to the latest firmware to keep up with the newest features being offered by Google/Samsung.  Read on then if you are running I8552XXAMDB firmware and are looking to root your Galaxy Grand Quattro.

I.  Before You Begin

1.  This guide is only for the Samsung Galaxy Grand Quattro running the I8552XXAMDB firmware version.  Do not try this on any other device or any other firmware.  If you have the newer I8552XXAMH2 firmware, use our guide here to help you.

2.  As always, back up everything you care about from your device before you start.

3.  Charge your device to 75% or more before you begin.

4.  Make sure you have the necessary drivers installed before you begin.  If you are not sure, install Samsung Kies that should take of care of things for you.

II.  Necessary Downloads

Framaroot-1.6.0.apk [File attached to this post]

III.  Rooting the Galaxy Grand Quattro

1.  Connect your device to your PC and copy the Framaroot-1.6.0.apk file you downloaded above to your device’s SD card.

2.  Use a file manager app (Astro or ES File Explorer, for example), navigate to the location of Framaroot-1.6.0.apk, and install the application.  Make sure you have enabled installation of apps from unknown sources by going to Settings > Security and ticking the Unknown sources checkbox.

3.  Go to your app drawer and open up the Framaroot app.

4.  Tap on Gandalf and wait for the success popup.

5.  Reboot your device.

Your device is now rooted!  But wait, you are still running the older kernel.  Use the section below to get back to your original kernel.

If this procedure helped you please thank/donate to the original developers here and here.

Read More: How to Root the Samsung Galaxy Grand Quattro (GT-I8552) Running I8552XXAMDB Firmware

How to Root the Samsung Galaxy Grand Quattro (GT-I8552) Running I8552XXAMH2 Firmware

$
0
0
Samsung-Galaxy-Grand-Quattro-Root-I8552XXAMH2

The Samsung Galaxy Grand Quattro, as its name implies, is a device that boasts of a quad-core 1.2GHz CPU, dual SIM support, a 5MP shooter, with a 4.7-inch display and running Android 4.1.2.  The device recently saw an update to version I8552XXAMH2 and if you are running this firmware and are looking to root it, the guide below is the one you should be reading.

I.  Before You Begin

1.  This guide is only for the Samsung Galaxy Grand Quattro running the I8552XXAMH2 firmware version.  Do not try this on any other device or any other firmware.  If you have the older I8552XXAMDB firmware, use our guide here to help you.

2.  As always, back up everything you care about from your device before you start.

3.  Charge your device to 75% or more before you begin.

4.  Make sure you have the necessary drivers installed before you begin.  If you are not sure, install Samsung Kies that should take of care of things for you.

II.  Necessary Downloads

1.  Samsung-Updates.com-KERNEL-GT-I8552-INU-I8552XXAMDB-1366790034.tar [Link available in this post]

2.  KERNEL-INU-I8552XXAMH2-1376457550.tar [Link available in this post]

3.  Framaroot-1.6.0.apk [File attached to this post]

4.  Odin 1.85.rar

III.  Flashing the Older Rootable Kernel

1.  Extract the Odin 1.85.rar file you downloaded above to a folder on your desktop.

2.  From the extracted folder, double-click on Odin3 v1.85.exe to run the tool.

3.  Put your device into Download mode.  To do this, power down your device, and press and hold the Volume Down + Home + Power buttons until you enter Download mode.

4.  Click on PDA button, locate Samsung-Updates.com-KERNEL-GT-I8552-INU-I8552XXAMDB-1366790034.tar you downloaded above and click on OK to load it on Odin.  The ID:COM field on Odin should now light up yellow to signify that your device is connected and recognized properly.  If not, reinstall Samsung Kies and try again.

5.  Make sure that the Re-Partition and Flash Lock are unchecked; this is important as you might brick your device if these options are ticked!

6.  Click on Start.

7.  Once done, reboot your device.

You now have a older rootable kernel and are ready to root!

IV.  Rooting the Galaxy Grand Quattro

1.  Connect your device to your PC and copy the Framaroot-1.6.0.apk file you downloaded above to your device’s SD card.

2.  Use a file manager app (Astro or ES File Explorer, for example), navigate to the location of Framaroot-1.6.0.apk, and install the application.  Make sure you have enabled installation of apps from unknown sources by going to Settings > Security and ticking the Unknown sources checkbox.

3.  Go to your app drawer and open up the Framaroot app.

4.  Tap on Gandalf and wait for the success popup.

5.  Reboot your device.

Your device is now rooted!  But wait, you are still running the older kernel.  Use the section below to get back to your original kernel.

V.  Flashing the Original Kernel

Follow the same steps as in Section III, but on step #4, choose the KERNEL-INU-I8552XXAMH2-1376457550.tar file you downloaded above..

If this procedure helped you please thank/donate to the original developers here and here.

Read More: How to Root the Samsung Galaxy Grand Quattro (GT-I8552) Running I8552XXAMH2 Firmware


How to Root the Samsung Galaxy Star Duos (GT-S5280/GT-S5282)

$
0
0
samsung-galaxy-star-s5280-root

The Samsung Galaxy Star Duos won’t win any awards for its specs, but it should suffice for someone looking for a decent entry-level Android device.  The phone features a 1GHz CPU with 512MB RAM, a 2MP cam, and a 3-inch touchscreen display.  The device currently runs Android 4.1.2 and if you want something more from it, rooting it is the way to go.  The guide below should help you with that aspect and you should be rooted in no time!

I.  Before You Begin

1.  Back up everything you feel is important.

2.  Charge your device to 75% or more before you begin.

3.  Make sure that the necessary drivers are in place.  If you aren’t sure, installing Samsung Kies usually takes care of this.

4.  This procedure only works with the GT-S5280/S5282 variants of the Samsung Galaxy Star Duos; do not try this on any other variant or device.

II.  Necessary Downloads

Impactor_0.9.12.zip [or the latest version available]

III.  Rooting the Samsung Galaxy Star Duos

1.  Extract Impactor_0.9.12.zip to a folder on your desktop.

2.  Enable USB Debugging on your device.  To do this, go to Settings > Development and tick the USB Debugging checkbox.

3.  Connect your device to your PC.  If your PC installs drivers at this stage, let it do so and then continue with the procedure.

4.  From the extracted folder, double-click on Impactor.exe.

5.  Choose # drop SuperSU su to /system/xbin/su from the drop-down menu.

6.  Click on Start in the Cydia Compactor app.

7.  Once Cydia Compactor has finished its job, your device should be partially rooted.  To complete the rooting process, go to the Play Store and install the SuperSu app and Busybox.

To verify root access, download an app like Root Checker Lite from the Play Store or any other app that requires root privileges.

If this procedure helped you please thank/donate to the original developers here.

Read More: How to Root the Samsung Galaxy Star Duos (GT-S5280/GT-S5282)

How to Root the AT&T Samsung Galaxy S4 (Build MF3)

$
0
0
Root the AT&T Samsung Galaxy S4 Build MF3

If you’re currently running the latest MF3 build on your AT&T Samsung Galaxy S4 smartphone, you’d be glad to know that a root method has surfaced the Internet for your device. That means, it’ll bring back the root-access that you had before you upgraded your device to this newer build. As you may already know, root on your Galaxy S4 will let you install root-only apps, flash custom recoveries and do much more with your device. So if you’re ready to bring back root on your device, follow our guide below:

I. Before You Begin:

1. This will void the warranty of your device. However, you can reinstate the warranty by unrooting your device if there’s any unrooting procedure available.

2. You must have a microSD card formatted with exFAT filesystem. Insert the card into your device.

II. Downloading Required Files:

1. Root Package (It’s attached in the first post)

2. Terminal EmulatorQR Code (Google Play Link)

III. Rooting the AT&T Samsung Galaxy S4 (Build MF3):

1. Download and place the Root Package archive on your Desktop.

2. Extract files from the archive over to your Desktop.

3. Plug in your device to your PC using the USB cable.

4. Copy all the files you extracted from the Root Package archive over to the root of your SD card.

5. Once all the files have been copied, disconnect your device from your PC.

6. Head over to the Google Play and download and install the Terminal Emulator app on your device.

7. Once the app’s been installed, launch it from your App Drawer.

8. Type in following commands into the app:

cd /mnt/extSdCard
./pwn
./script.sh

9. Once you’re done with the commands, just open up the SuperSU app to check if everything’s fine.

10. You’re done!

Excellent! You’ve successfully rooted your AT&T Galaxy S4 on Build MF3 and you can confirm the root-access by simply downloading the Root Checker app from Google Play!

IV. Flash a Custom Recovery Image (Optional):

1. If you would like to flash a custom recovery image in order to flash custom ROMs, head to the How To Flash a Custom Recovery Image on the AT&T Samsung Galaxy S4 to learn how to do that.

If this procedure helped you please thank/donate to the original developers here.

Read More: How to Root the AT&T Samsung Galaxy S4 (Build MF3)

How to Root the Sprint Samsung Galaxy S4 (Build MF9)

$
0
0
Root the Sprint Samsung Galaxy S4 Build MF9

Sprint has lately been busy rolling out its latest build to the Galaxy S4 smartphones and it looks like the methods that used to work on older builds don’t work on this newer build. But you shouldn’t be worried about root methods where the developers like Chainfire are around. He’s come up with a method to root this MF9 build and allow users to have root-access back on their devices. The whole procedure’s explained below so you shouldn’t have any issues rooting your device. Here you go:

I. Before You Begin:

1. This will void the warranty of your device. However, you can reinstate the warranty by unrooting your device if there’s any unrooting procedure available.

2. Make sure your device has at least 60% of battery life left.

3. You should have appropriate drivers installed on your PC. If you don’t, download the latest drivers from here.

II. Downloading Required Files:

1. Odin

2. CWM Recovery (Download the latest version from the list)

3. SuperSU (It’s first on the Downloads list)

III. Flashing a Custom Recovery on the Sprint Samsung Galaxy S4 (Build MF9):

1. Place all the files you’ve downloaded to your Desktop.

2. Extract files from the Odin archive over to your Desktop.

3. Double-click on the Odin executable file and it’ll launch.

4. Click on PDA and select the CWM Recovery file to be flashed on your device.

5. Make sure to uncheck the box labeled as Repartition.

6. Checkmark the boxes that say Auto Reboot and F. Reset Time.

7. Turn OFF your device.

8. Turn it back on by holding down Volume DOWN+Home+Power buttons together.

9. You’ll see a warning message on your screen, just hit the Volume UP button and you’ll be taken to the Download mode.

10. Plug in your device to your PC using the USB cable.

11. Hit Start in the Odin and it’ll begin flashing the recovery on your device, shouldn’t take too long to finish.

12. Once the recovery’s been flashed, your device will automatically reboot.

13. You’re done!

Great! You’ve successfully flashed CWM Recovery on your device, it’s time to root your device now!

IV. Rooting the Sprint Samsung Galaxy S4 (Build MF9):

1. Connect your device to your PC using the USB cable.

2. Copy the SuperSU zip over to the root of your SD card.

3. Once the zip has been copied, disconnect your device from your PC.

4. Turn OFF your device.

5. Turn it back on by holding down Volume UP+Home+Power buttons together.

6. Once in Recovery, select install zip from sdcard followed by choose zip from sdcard.

7. Choose the SuperSU zip to be flashed on your device.

8. It’ll begin flashing the zip on your device, just be patient.

9. Once the zip has been flashed, reboot your device.

10. You’re now rooted!

Excellent! Your Sprint Galaxy S4 has been successfully rooted and you have the SuperSU app up and running on your device. Enjoy!

V. Flash a Custom ROM (Optional):

1. If you are ready to flash custom ROMs on your device, head to the How To Flash a Custom ROM on the Sprint Samsung Galaxy S4 to learn how to do that.

If this procedure helped you please thank/donate to the original developers here.

Read More: How to Root the Sprint Samsung Galaxy S4 (Build MF9)

How to Root the Samsung Galaxy S4 on Android 4.3

$
0
0
Root the Samsung Galaxy S4 on Android 4.3

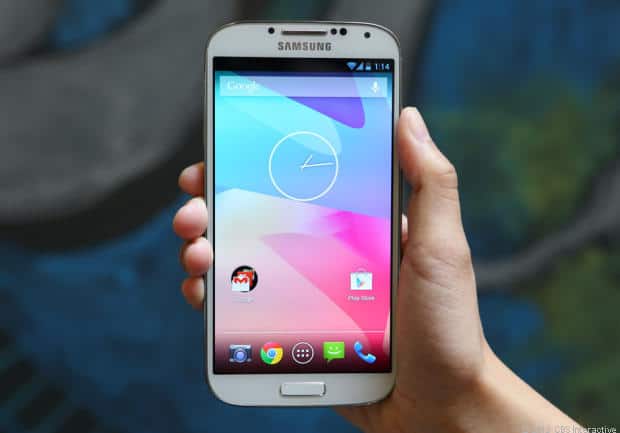
If you’re one of those Galaxy S4 users who have flashed the Google Play Edition ROM on their devices, then you would be glad to know that you can now root your device, all thanks to Chainfire for bringing us the simplest root method ever available. The guide below shows how you can root your Galaxy S4 on the Android 4.3, and here you go:

I. Before You Begin:

1. You must be running the Google Play Edition ROM (Android 4.3) on your device. This one.

II. Downloading Required Files:

1. SuperSU

III. Rooting the Samsung Galaxy S4 on Android 4.3:

1. Download and place the SuperSU zip on your Desktop.

2. Connect your device to your PC using the USB cable.

3. Copy the SuperSU zip over to the root of your SD card.

4. Once the zip has been copied, unplug your device from your PC.

5. Turn OFF your device.

6. Turn it back on by holding down Volume UP+Home+Power buttons together.

7. You should now be in Recovery mode.

8. Select install zip from sdcard followed by choose zip from sdcard.

9. Choose the SuperSU zip to be flashed on your device.

10. It should begin flashing the file on your device and will let you know when it’s done.

11. Once the flashing’s done, reboot your device.

12. You’re now rooted!

Congrats! You’ve successfully rooted your Galaxy S4 on Android 4.3, cheers!

If this procedure helped you please thank/donate to the original developers here.

Read More: How to Root the Samsung Galaxy S4 on Android 4.3

How to Install Flash Player on the Samsung Galaxy S4

$
0
0
How to Install Flash Player on the Samsung Galaxy S4

If you’re fond of browsing various rich content – flash websites, then you’d be a bit disappointed because your Samsung Galaxy S4 doesn’t come with Flash Player pre-installed on it. This prevents you from being able to see flash content available on various websites. However, you don’t have to worry about it anymore as we’ve just found a solution to your problem. Follow the guide below and you should be able to access any flash enabled website on your Galaxy S4 device.

I. Before You Begin:

1. This works on all the variants of the Galaxy S4, including the AT&T, T-Mobile, Sprint, etc.

II. Downloading Required Files:

1. Flash Player APK

2. Firefox BrowserQR Code (Google Play Link)

III. Installing Flash Player on the Samsung Galaxy S4:

1. Download and place the Flash Player APK file on your Desktop.

2. Connect your device to your PC using the USB cable.

3. Copy the APK file over to the root of your SD card.

4. Once the file’s been copied, disconnect your device from your PC.

5. On your device, head to Menu>>Settings>>Security and enable the Unknown sources option.

6. Open the File Manager app on your device and install the APK you copied earlier.

7. Now open up the Firefox browser and open any flash enabled website.

8. You should be able to see the flash content on that website.

9. You’re done!

Awesome! The fun and joy that comes with those multimedia rich flash can now be enjoyed on your Galaxy S4 device without any issues!

If this procedure helped you please thank/donate to the original developers here.

Read More: How to Install Flash Player on the Samsung Galaxy S4

Viewing all 242 articles
Browse latest View live